

If you’ve ever seen a photo with beautiful streaks of sunlight spilling across it, you’ve probably admired a lens flare effect. In photography, lens flare can turn an ordinary shot into something magical, dreamy, or cinematic. Photeeq lens flare makes it simple for anyone to add this look, even if you’ve never edited a photo before. Whether you want warm golden light, dramatic beams, or soft glowing halos, Photeeq gives you tools to get it done quickly. This guide will walk you through exactly what it is, how it works, and how to use it for amazing photos.
What Is Photeeq Lens Flare?
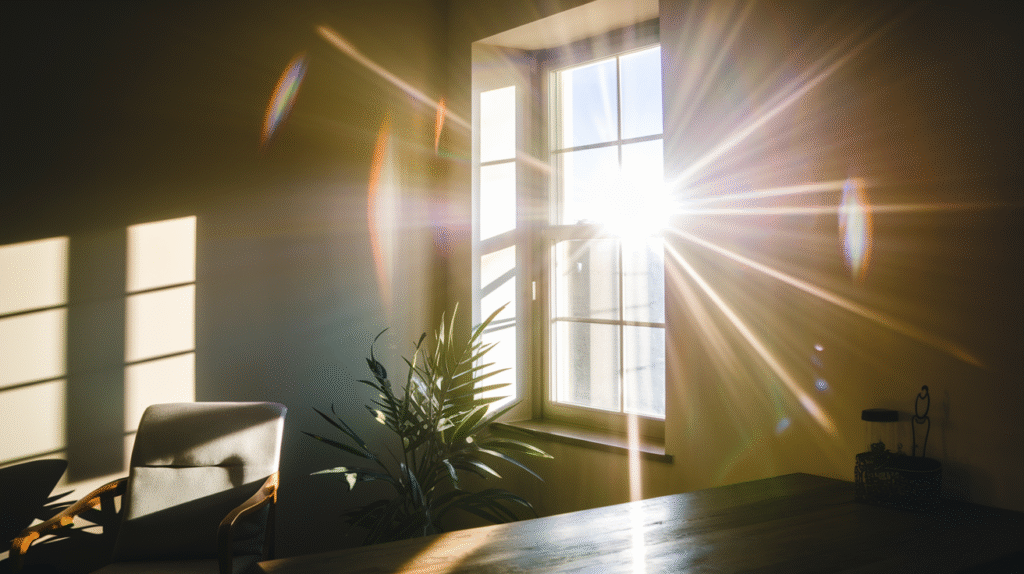
Photeeq lens flare is a photo-editing tool and effect that adds light streaks, glows, and reflections to images. In photography, a lens flare happens naturally when bright light, like the sun or a streetlamp, hits the camera lens directly. This light bounces inside the lens, creating colorful streaks, glowing circles, or hazy washes across the image.
Normally, photographers capture lens flare in-camera, but with Photeeq, you can create the same look digitally. This is especially useful when the original lighting wasn’t perfect or when you want to add a creative twist to your photo. Many content creators, bloggers, Instagram photographers, and even marketers use Photeeq’s lens flare filters to enhance their pictures without expensive equipment.
Unlike basic editing tools, Photeeq gives you a realistic, customizable light effect that looks like it came from the camera—not just slapped on with a filter. You can control the direction, color, intensity, and size of the flare, making it fit naturally into your photo.
How Photeeq Lens Flare Works
Photeeq uses a combination of digital overlays, blending modes, and lighting adjustments to simulate the way light interacts with a real camera lens. When you apply a Photeeq lens flare overlay, it layers a semi-transparent light pattern over your photo. Then, the software blends it with your image so it looks like the flare was captured in the shot.
You can drag, rotate, and scale the flare to match your photo’s light source. For example, if the sun is coming from the top left, you can position the flare there so it feels realistic. You can also soften the edges or change the hue to match a sunset, daylight, or artificial light.
One of the reasons Photeeq lens flare effects look so convincing is that they mimic the shapes and colors of real optical glass flares. You’ll see rainbow streaks, circular orbs, and gentle hazes that photographers often get when shooting toward the sun.
Ways to Use Photeeq Lens Flare
Photeeq isn’t just for “adding pretty light.” You can use it to set a mood, draw attention, or give your images a cinematic quality. Let’s explore some creative ways to make the most of it.
Make Photos Look Warm
Adding a warm lens flare effect instantly makes a photo feel cozy and inviting. This is perfect for golden-hour portraits, travel shots, and lifestyle photography. By choosing a flare with yellow, orange, or red tones, you can simulate that late-afternoon glow even if the photo was taken at midday.
For example, a beach shot at noon might look flat, but with a warm sun flare filter, it suddenly feels like a romantic sunset. Many photographers use this trick to add emotional depth to their images.
Add Drama to Your Shots
If you want your photo to look bold and striking, a high-contrast lens flare can help. By placing a bright flare against darker backgrounds—like city skylines at night or silhouettes in the evening—you can create strong visual impact.
This works well for cinematic photography, fashion shoots, and even sports images. The intense burst of light draws the viewer’s eye, making the photo more dynamic.
Create a Dreamy Look
Soft, hazy lens flares with pastel tones can make a scene feel like it’s from a fairy tale. Photeeq allows you to lower the flare’s intensity and blend it gently into the background, so it looks like a natural light leak.
This is a popular effect for wedding photography, baby portraits, and fantasy-style edits. The key is to keep the light gentle, so it wraps around the subject rather than overpowering them.
Tips for Adding Photeeq Lens Flare Naturally
While it’s tempting to go overboard, the best lens flare effects are subtle. Here are some tips to make them look believable:
- Match the light source – Always place your flare in the same direction as the real light in your photo.
- Blend colors naturally – If your photo has cool tones, avoid adding a warm flare that feels out of place.
- Control intensity – Lower the opacity so the flare complements the image instead of dominating it.
- Think about the scene – A sunny outdoor shot works better for flares than an indoor, low-light picture.
By following these steps, you’ll make your flares look like they were captured in-camera.
Common Mistakes to Avoid
Many beginners make the same errors when adding a Photeeq lens flare effect:
- Over-saturation – Extremely bright colors can make the flare look fake.
- Wrong placement – Putting the flare in a direction where no light exists confuses the viewer.
- Too many effects – Layering multiple flares can make the image messy.
- Ignoring shadows – If your subject’s shadows don’t match the light source, the flare feels unrealistic.
Avoiding these mistakes will make your photos more polished and professional.
Best Camera Settings for Photeeq Lens Flare
Even though Photeeq can add flares in post-production, you can also capture natural ones in-camera for a more authentic look. Combining both methods can give you the best results.
Use a Small f-stop
A small f-stop number (like f/2.8 or f/4) allows more light into the lens, increasing your chances of catching a flare. Wide apertures also create softer backgrounds, which pair nicely with lens flare effects.
Try Shooting Into the Light
To get a natural flare, aim your camera toward the light source. This could be the sun, a lamp, or even car headlights at night. Just be careful not to look directly at the sun for too long—it’s harmful to your eyes and your camera sensor.
Experiment with Angles
Slightly tilting your camera can change the shape and intensity of the flare. Sometimes moving just a few degrees can transform a harsh glare into a soft glow.
Thoughts on Photeeq Lens Flare
Photeeq lens flare is one of the easiest ways to enhance your photos without complicated editing. Whether you’re a beginner learning photography basics or an experienced creator working on professional shots, this tool can give your images extra magic. By combining natural lighting with digital light flare overlays, you can produce stunning, attention-grabbing visuals.
The Bottom Line
Lens flare isn’t just a photography mistake—it’s a creative tool. With Photeeq lens flare, you don’t need perfect weather, expensive gear, or professional editing skills to get cinematic light effects. All it takes is a little creativity, attention to detail, and the willingness to experiment. The result? Photos that feel warmer, more dramatic, and beautifully unique.